WS2812BとシリアルI/FでLチカ
フルカラーLEDの集合体(単一やテープ状あるいは正方形に配列したものと多種存在)を駆動する仕組みはシリアルな信号を送ることで行います。シリアルな信号といえば古典的なRS-232Cという規格で定義されたものが有名ですが、古典的過ぎてつまりレガシー過ぎて、最近のPCには装備されていません。そういう場合のためにUSBにつないでRS-232CなI/F(正確にはなんちゃってRS-232Cでまず信号レベルが合致しません)を模倣するチップがあります。それを小型基板に実装したものの例が、

これです。これを使って、うまくタイミングを取るとWS2812BなLED群を駆動できるようですので、その具体的なやり方を記事にします。まずは基礎編ですね。
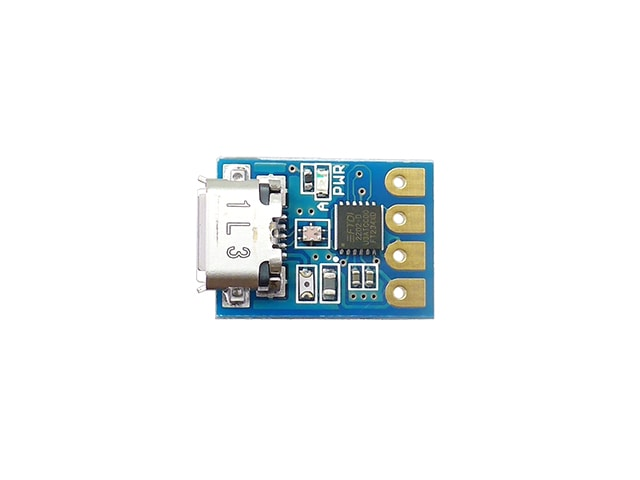
基板自体は、このサイズで、左側がUSB-Bメスで、右がシリアルI/F側(但しなんちゃってなので、TTLレベルつまり0-5Vレベル)使用時の基板が、
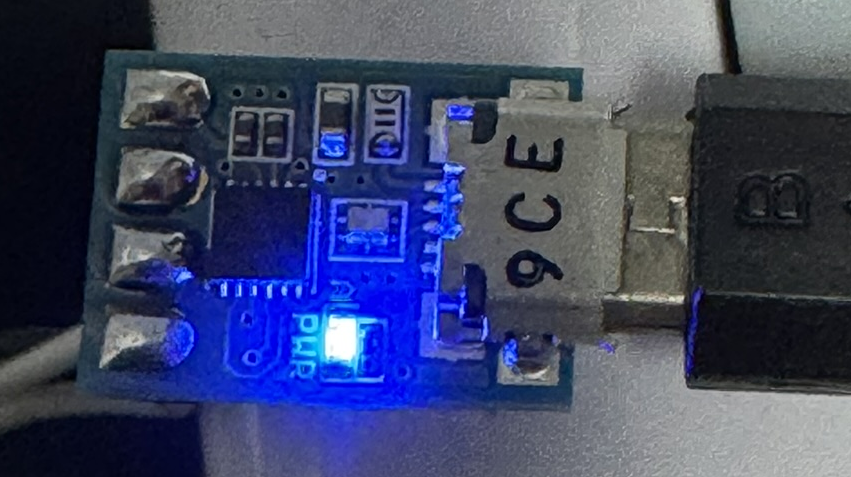
PC側に認識されると、上図のように“PWR”LEDが点灯します。ここでシリアルのポート番号を設定する必要があります。まずWindowsのデバイスマネージャーから、
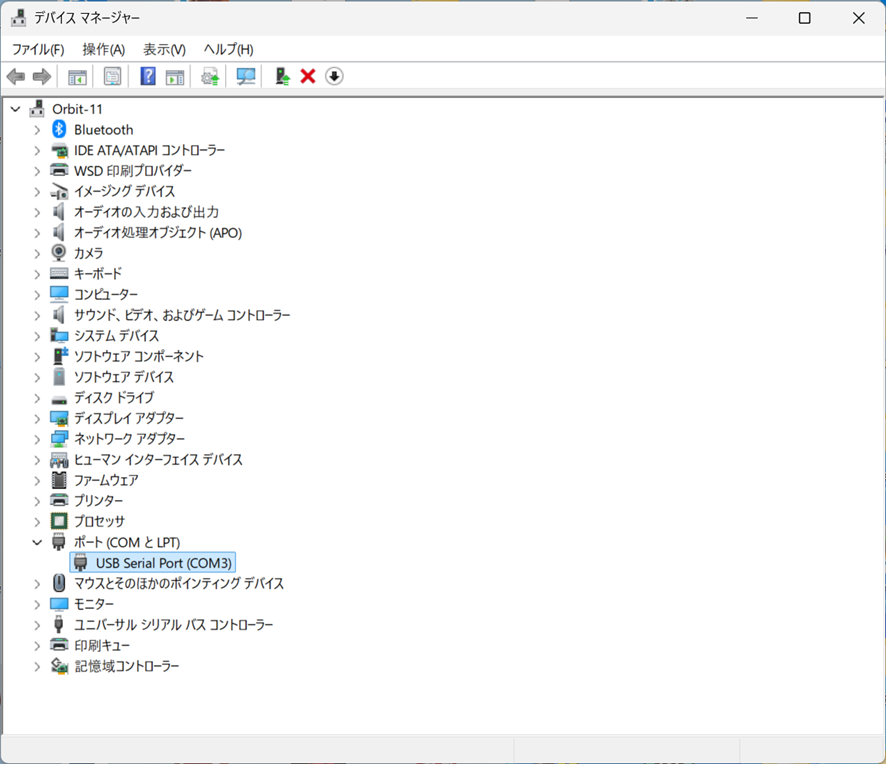
上記をダブルクリック、
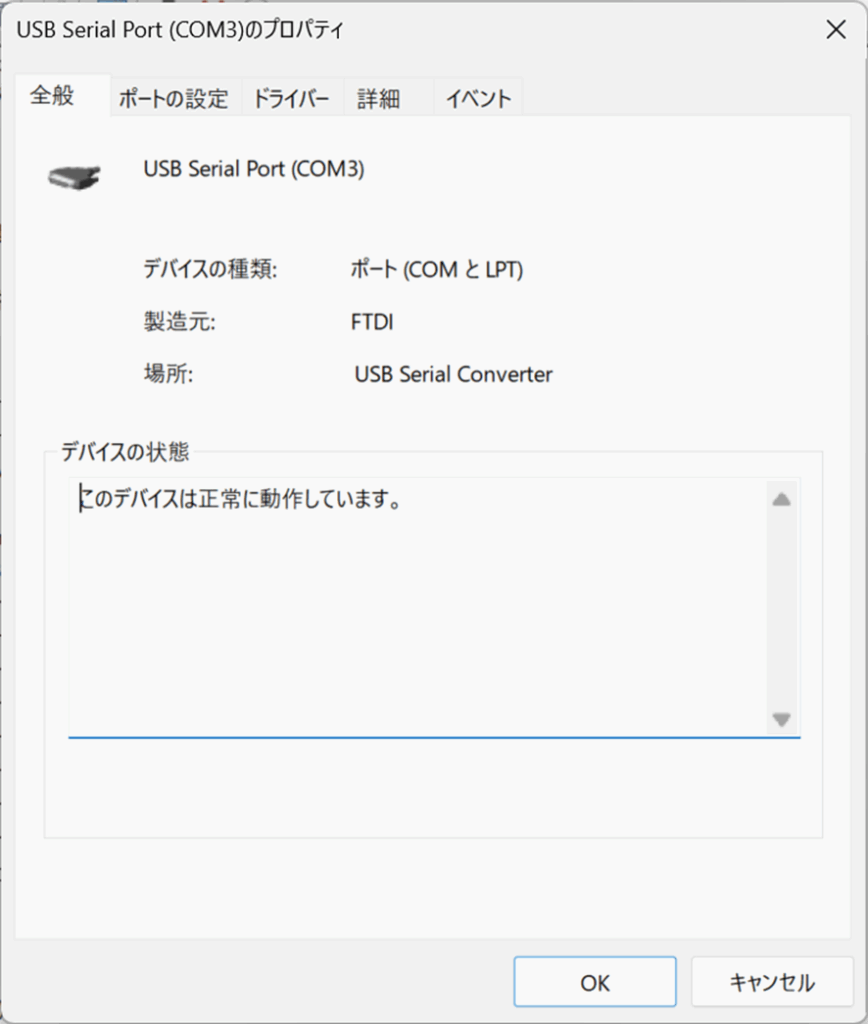
ポートの設定をクリック、
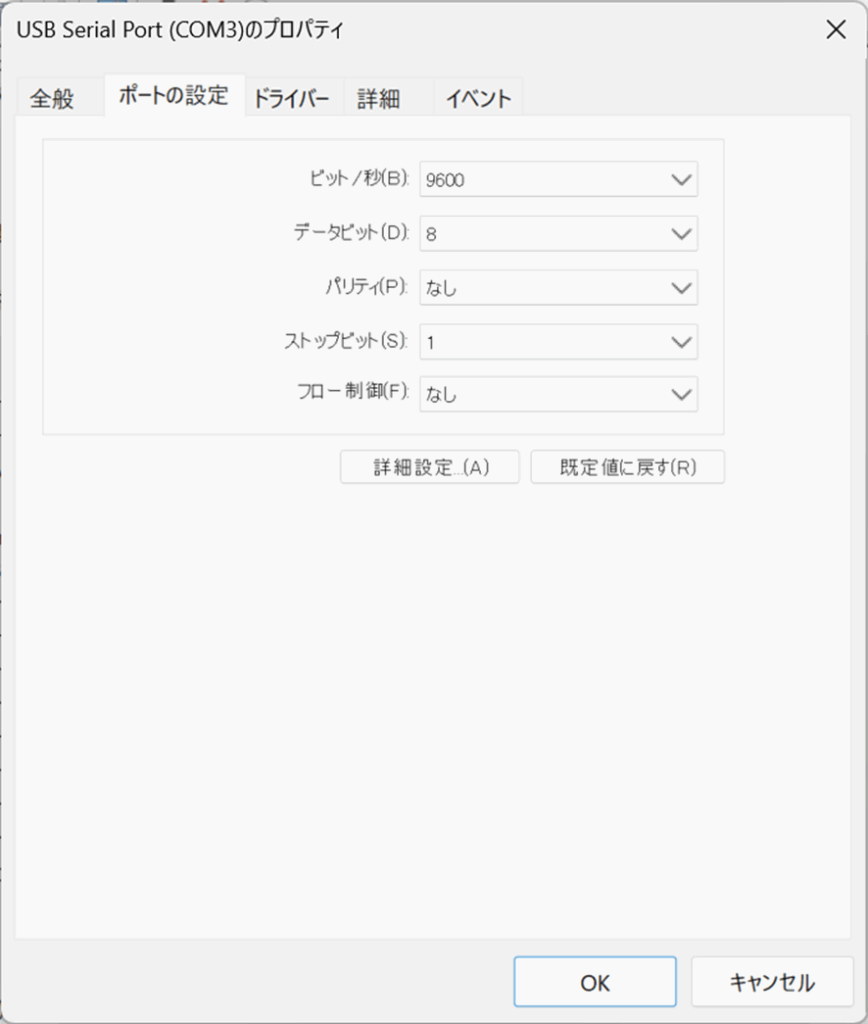
ここで詳細設定、
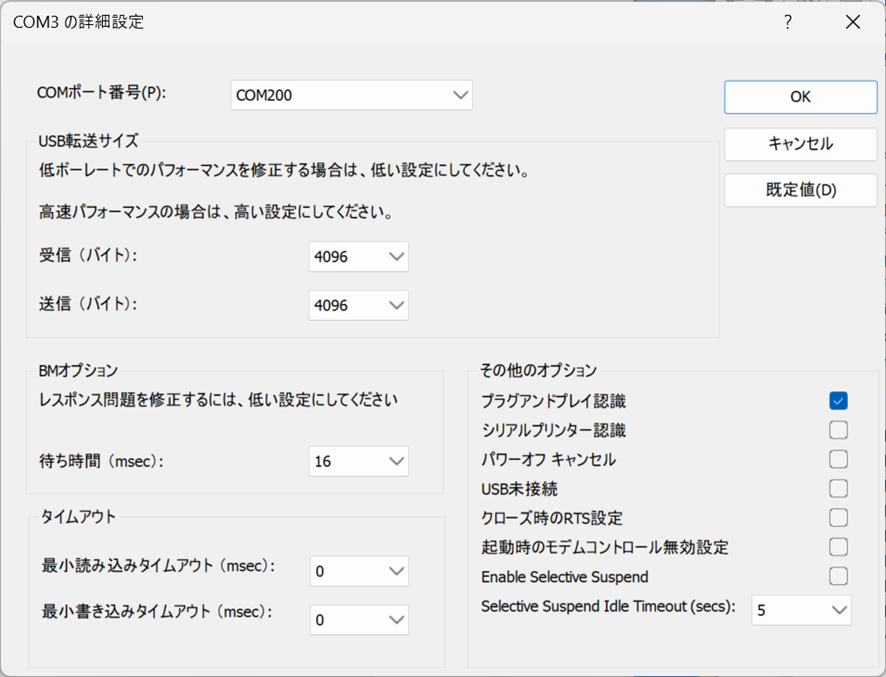
左側一番上を“COM200”へ、で”OK”をクリック、COMポート番号を記録するか所望のものに設定しておく必要があります。筆者は習慣的に200にしています。デバイスマネージャーに戻って、
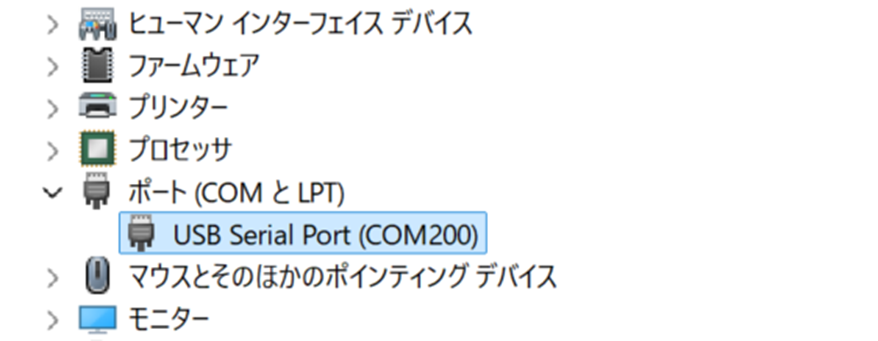
になっていればおけ。全部閉じます。
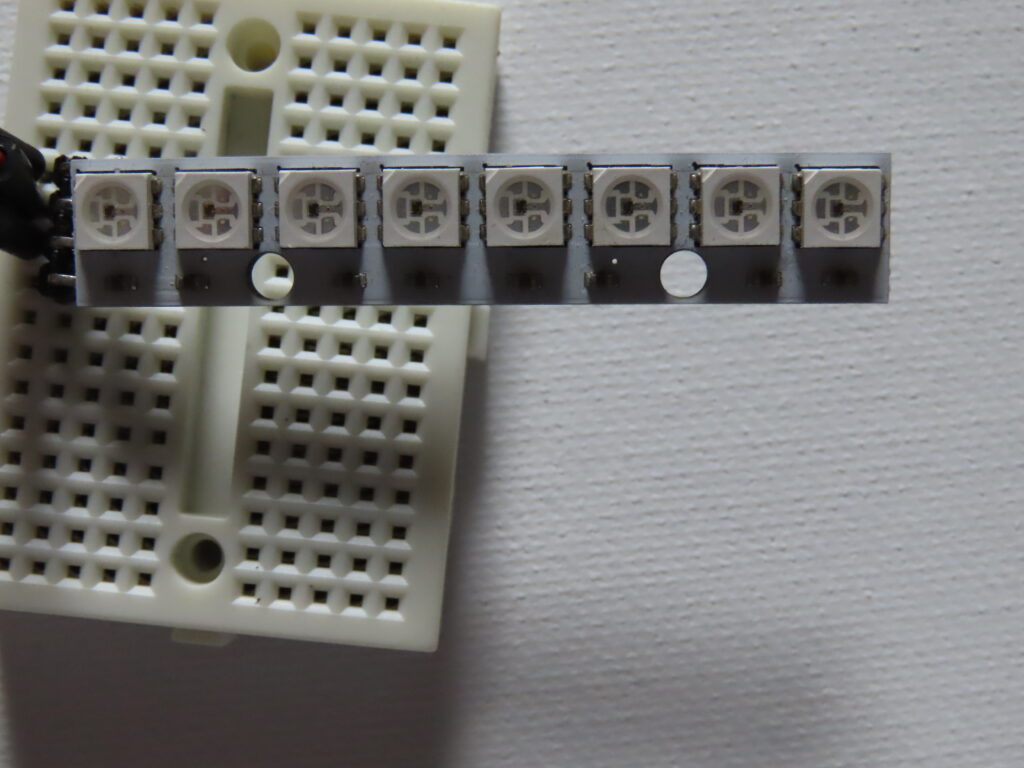
今回は上図の8素子直列のWS2812B素子を使います。amazonだと、

ユニバーサル基板に挿すために、L字ブラケットをはんだ付けしますけど、付けた状態では極めて脆いので細心の注意が必要です。2個セットを買いましたが、すでに1個壊れてこれだけ残っています。さて、一番下の素子レベルのドライバーですが、RS-232CなI/Fで駆動するので、C++から扱えるドライバーが必要です。自分で書いたものではありません。出典不明で恐縮ですが、まずヘッダーから、“SerialPort.h”は、
#ifndef SerialPort_H
#define SerialPort_H

#include <cstdlib>
#include <iostream>
#include <stdio.h>
#include <stdlib.h>
#include <map>
#include <string>
#include <string.h>

#include <windows.h>
#include <conio.h>

#define RX_SIZE         4096    // in buffer size
#define TX_SIZE         4096    // out buffer size
#define MAX_WAIT_READ   5000    // max waiting time (in ms)


class SerialPort
{
public :
  SerialPort();
  virtual ~SerialPort();

  bool Open(std::string s);
  bool Read(char* buffer, unsigned int nBytesToRead, unsigned int *pBytesRead);
  bool Write(unsigned char *buffer, unsigned int nBytesToWrite, unsigned int *pBytesWritten);
  bool Close();

private :

  HANDLE	  	g_hCOM;
  COMMTIMEOUTS  g_cto;
  DCB         	g_dcb;

  void Init();

};

#endif
“SerialPort.cpp”は、
#include "SerialPort.h"

using namespace std;

SerialPort::SerialPort()
{

  this->Init();

}

SerialPort::~SerialPort()
{
  this->Close();
}

void SerialPort::Init()
{
  g_hCOM = NULL;
  COMMTIMEOUTS t_g_cto =
  {
    //MAX_WAIT_READ,  /* ReadIntervalTimeOut          */
    0,              /* ReadTotalTimeOutMultiplier   */
    //MAX_WAIT_READ,  /* ReadTotalTimeOutConstant     */
    0,              /* WriteTotalTimeOutMultiplier  */
    0               /* WriteTotalTimeOutConstant    */
  };

  memcpy(&g_cto, &t_g_cto, sizeof(t_g_cto));

  //  port configuration
  DCB t_g_dcb =
  {
    sizeof(DCB),        /* DCBlength            */
    3000000,    //19200,               /* BaudRate             */
    TRUE,               /* fBinary              */
    FALSE,              /* fParity              */
    FALSE,              /* fOutxCtsFlow         */
    FALSE,              /* fOutxDsrFlow         */
    DTR_CONTROL_ENABLE, /* fDtrControl          */
    FALSE,              /* fDsrSensitivity      */
    FALSE,              /* fTXContinueOnXoff    */
    FALSE,              /* fOutX                */
    FALSE,              /* fInX                 */
    FALSE,              /* fErrorChar           */
    FALSE,              /* fNull                */
    RTS_CONTROL_ENABLE, /* fRtsControl          */
    FALSE,              /* fAbortOnError        */
    0,                  /* fDummy2              */
    0,                  /* wReserved            */
    0x100,              /* XonLim               */
    0x100,              /* XoffLim              */
    8,                  /* ByteSize             */
    NOPARITY,           /* Parity               */
    ONESTOPBIT,         /* StopBits             */
    0x11,               /* XonChar              */
    0x13,               /* XoffChar             */
    '?',                /* ErrorChar            */
    0x1A,               /* EofChar              */
    0x10                /* EvtChar              */
  };

  memcpy(&g_dcb, &t_g_dcb, sizeof(t_g_dcb));
}


bool SerialPort::Open(std::string nId)
{

  nId = "\\\\.\\COM" + nId;
  std::wstring FilePath(nId.begin(), nId.end());

  g_hCOM = CreateFile(FilePath.c_str(), GENERIC_READ|GENERIC_WRITE, 0, NULL, OPEN_EXISTING, FILE_ATTRIBUTE_SYSTEM, NULL);
  if (g_hCOM == INVALID_HANDLE_VALUE)
    return false;

  SetupComm(g_hCOM, RX_SIZE, TX_SIZE);

  if (!SetCommTimeouts(g_hCOM, &g_cto) || !SetCommState(g_hCOM, &g_dcb))
    {
      CloseHandle(g_hCOM);
      return false;
    }

  PurgeComm(g_hCOM, PURGE_TXCLEAR|PURGE_RXCLEAR|PURGE_TXABORT|PURGE_RXABORT);
  EscapeCommFunction(g_hCOM, SETDTR);
  return true;

}

bool SerialPort::Close()
{

    return CloseHandle(g_hCOM);
}

bool SerialPort::Read(char *buffer, unsigned int nBytesToRead, unsigned int *readBytes)
{
  int tmp(0);

  *readBytes = 0;
  while (*readBytes < nBytesToRead)
    {

      if (!ReadFile(g_hCOM, buffer + *readBytes, nBytesToRead - *readBytes, (DWORD*)&tmp, NULL))
        return false;

      *readBytes += tmp;
    }
  return true;
}

bool SerialPort::Write(unsigned char *buffer, unsigned int nBytesToWrite, unsigned int *pBytesWritten)
{
  int tmp(0);

  *pBytesWritten = 0;
  while (*pBytesWritten < nBytesToWrite)
    {

      if (!WriteFile(g_hCOM, buffer + *pBytesWritten, nBytesToWrite - *pBytesWritten, (DWORD*)&tmp, NULL))
        return false;

      *pBytesWritten += tmp;
    }
  return true;
}一応クラスですね。さて、ws2812bを扱うのにもクラスを使いましょうかね。ここ以降は一応筆者のオリジナルです。
まず、“ws2812b.h”は、
#ifndef __ws2812b
#define __ws2812b

#include <stdint.h>
#include "SerialPort.h"


struct CCRGB {
    union {
        struct {
            union {
                uint8_t r;
                uint8_t red;
            };
            union {
                uint8_t g;
                uint8_t green;
            };
            union {
                uint8_t b;
                uint8_t blue;
            };
        };
        uint8_t raw[3];
    };

    inline CCRGB& setRGB(uint8_t nr, uint8_t ng, uint8_t nb)//__attribute__((always_inline))
    {
              r = nr;
              g = ng;
              b = nb;
              return *this;
     }
};


class ws2812b {
	public:

	ws2812b( int numofleds, CCRGB* leds );
	void showleds();
    void clear();
	private:
        const unsigned char table[4] = { 0xef, 0xcf, 0xee, 0xce };

		int lednum;
        CCRGB* array;
		SerialPort port;
        unsigned bufsize;
		unsigned char* obuf;

};

#endif“ws2812b.cpp”は、
#include <stdio.h>
#include "SerialPort.h"
#include "ws2812b.h"

ws2812b::ws2812b( int numleds, CCRGB* leds)
{
	//SerialPort wrap;
	//black.setRGB(0, 0, 0) :
	if( !port.Open("200"))
	{
		fprintf(stderr, "can't open port\n");
		return;
	}
	lednum = numleds;
	array = leds;
	bufsize = 8 / 2 * 3 * numleds;
	obuf = (unsigned char*)malloc(bufsize);	// total bytes required
	if( !obuf ){
		fprintf(stderr, "can't alloc output buffer\n");
		return;

	}
}

void ws2812b::showleds()
{
	unsigned int	tr;
	int index = 0;
	for( int i = 0 ; i < lednum ; i++ ){
		obuf[index++] = table[array[i].g >> 6 & 0x03];
		obuf[index++] = table[array[i].g >> 4 & 0x03];
		obuf[index++] = table[array[i].g >> 2 & 0x03];
		obuf[index++] = table[array[i].g >> 0 & 0x03];
		obuf[index++] = table[array[i].r >> 6 & 0x03];
		obuf[index++] = table[array[i].r >> 4 & 0x03];
		obuf[index++] = table[array[i].r >> 2 & 0x03];
		obuf[index++] = table[array[i].r >> 0 & 0x03];
		obuf[index++] = table[array[i].b >> 6 & 0x03];
		obuf[index++] = table[array[i].b >> 4 & 0x03];
		obuf[index++] = table[array[i].b >> 2 & 0x03];
		obuf[index++] = table[array[i].b >> 0 & 0x03];

	}
	port.Write(obuf, bufsize, &tr);
}

void ws2812b::clear()
{

	for (int i = 0; i < lednum; i++)
		array[i].setRGB(0, 0, 0);
	showleds();


}
です。いつもとは逆で、Unit1.cppやらフォームを示す前に、動作している状況を動画で示しましょうか。
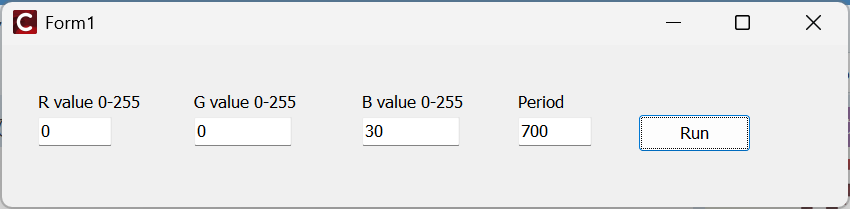
“Run”で、
RGBの値やPeriodを変えると、
Unit1.cppは、
//---------------------------------------------------------------------------

#include <vcl.h>
#pragma hdrstop

#include "ws2812b.h"
#include "Unit1.h"
//---------------------------------------------------------------------------
#pragma package(smart_init)
#pragma resource "*.dfm"

#define NUMLEDS 8

ws2812b* aled;

CCRGB leds[NUMLEDS];
CCRGB tables[NUMLEDS];


TForm1 *Form1;
//---------------------------------------------------------------------------
__fastcall TForm1::TForm1(TComponent* Owner)
	: TForm(Owner)
{

	aled = new ws2812b(NUMLEDS, leds);
	aled->clear();

		//leds[(int)(lastl*NUMLEDS/2)].setRGB(3*r,0,0);

    	aled->showleds();
}
//---------------------------------------------------------------------------
void __fastcall TForm1::Button1Click(TObject *Sender)
{
	for (int i = 1; i < NUMLEDS+1 ; i++) {
		leds[i - 1].setRGB(StrToInt(LabeledEdit1->Text), StrToInt(LabeledEdit2->Text), StrToInt(LabeledEdit3->Text));
		aled->showleds();
		Sleep(StrToInt(LabeledEdit4->Text));
		leds[i-1].setRGB(0,0,0);
	}

	//getchar();
    aled->clear();

}
//---------------------------------------------------------------------------
これだけです。一応所望の動作はしていますね。
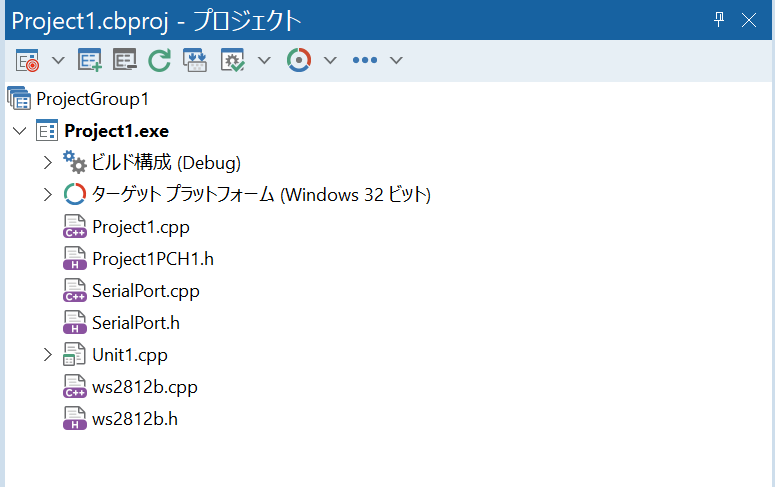
プロジェクトの構成は上図のようになっています。少し趣向を変えて、別のプログラムですが、
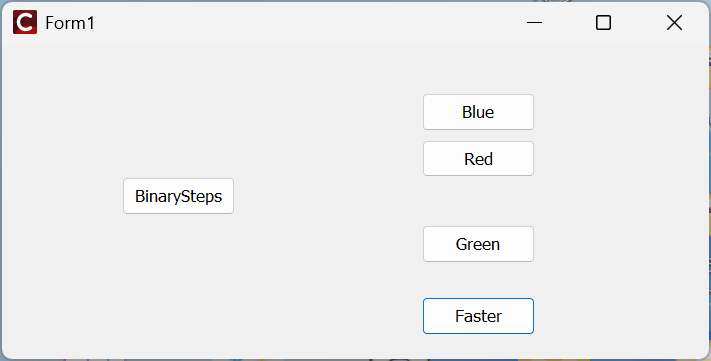
BinaryStepsをクリックすると、
Unit1.cppは、
//---------------------------------------------------------------------------

#include <vcl.h>
#pragma hdrstop

#include "ws2812b.h"
#include "Unit1.h"
//---------------------------------------------------------------------------
#pragma package(smart_init)
#pragma resource "*.dfm"

#define NUMLEDS 8

TForm1 *Form1;
CCRGB leds[NUMLEDS];
ws2812b* aled;//= new ws2812b(NUMLEDS, leds);

//---------------------------------------------------------------------------
__fastcall TForm1::TForm1(TComponent* Owner)
	: TForm(Owner)
{


	aled = new ws2812b(NUMLEDS, leds);
	aled->clear();


}
//---------------------------------------------------------------------------
void __fastcall TForm1::Button1Click(TObject *Sender)
{
// B

   //aled->clear();
	for (int i = 1; i < NUMLEDS+1 ; i++) {
		leds[i - 1].setRGB(0, 0, 30);
		aled->showleds();
		Sleep(700);
		leds[i-1].setRGB(0,0,0);
	}

	//getchar();
	aled->clear();

}
//---------------------------------------------------------------------------
void __fastcall TForm1::Button2Click(TObject *Sender)
{
//  R
	int k;

	//aled->clear();
	for (k = 0; k < NUMLEDS ; k++) {
		leds[k].setRGB(30, 0, 0);
		aled->showleds();
		Sleep(700);
		leds[k].setRGB(0,0,0);
	}


	aled->clear();

}
//---------------------------------------------------------------------------
void __fastcall TForm1::Button3Click(TObject *Sender)
{
//  G

   //aled->clear();
	for (int i = 0; i < NUMLEDS ; i++) {
		leds[i].setRGB(0, 30, 0);
		aled->showleds();
		Sleep(700);
		leds[i].setRGB(0,0,0);
	}

	aled->clear();

}
//---------------------------------------------------------------------------
void __fastcall TForm1::Button4Click(TObject *Sender)
{
	//aled->clear();


	for( int i = 0 ; i < NUMLEDS ; i++ ){
		leds[i].setRGB(30,0,0);
		aled->showleds();
		Sleep(700);
		leds[i].setRGB(0,0,0);
		//aled->clear();
	}
	aled->clear();

}
//---------------------------------------------------------------------------
void __fastcall TForm1::BinaryStepsClick(TObject *Sender)
{
	//aled->clear();
	int seed = 1;
	for (int i = 0; i < NUMLEDS ; i++) {
		leds[i].setRGB(seed, seed, seed);
		aled->showleds();
		Sleep(700);
		seed *= 2;
		// 1,2,4,8,16,32,64,128
		//leds[i].setRGB(0,0,0);
	}
    Sleep(500);

	aled->clear();

}
//---------------------------------------------------------------------------
上図の最後がBinaryStepsのコードで、文字通りseed=1から初めて、倍々に明るさを増やしていって表示しているので、左から1,2,4,8,16,32,64,128の明るさのサンプルです。128でも相当な眩しさですよね。255(max)を試す前に、電流負荷を測ってみるのが吉ですが、目を痛めそうなので、止めておきます。基礎編は以上です。次はもう少し実用的(派手ともいふ)なプログラムを紹介しましょう。
コメント