Digital OutでLチカ USB-IO2 AKI 復刻記事
Digital Outを扱うのは、USB経由でやるのが簡便です。実験室レベルだと、DOカードとかをPCIスロットに挿したりしますが、ここでは簡単に下記I/Fを用います。
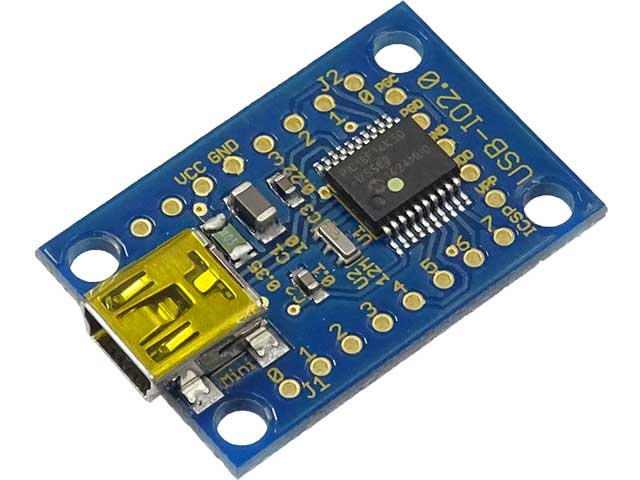
秋月で安価で入手できます。
これはドライバ不要でWindowsからは即認識されますが、C++から駆動するにはドライバが必要となります。ここでは、山本ワールドさんが開発されたソースを使わせてもらいます。サイトは、
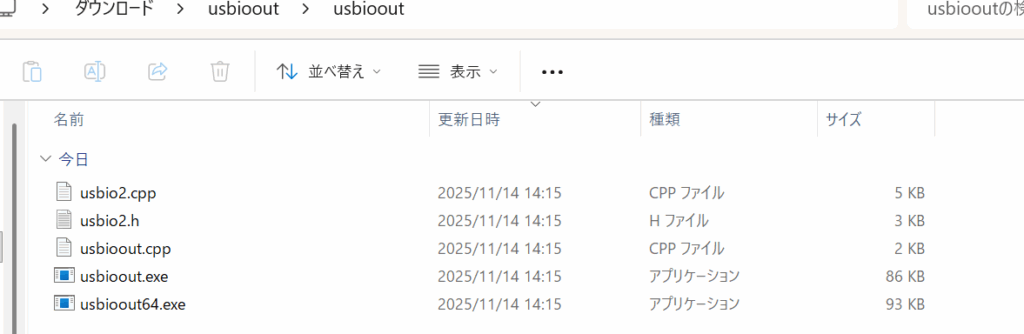
ここになります。中程のusbioout.zipをダウンロードさせてもらいます。解凍すると、
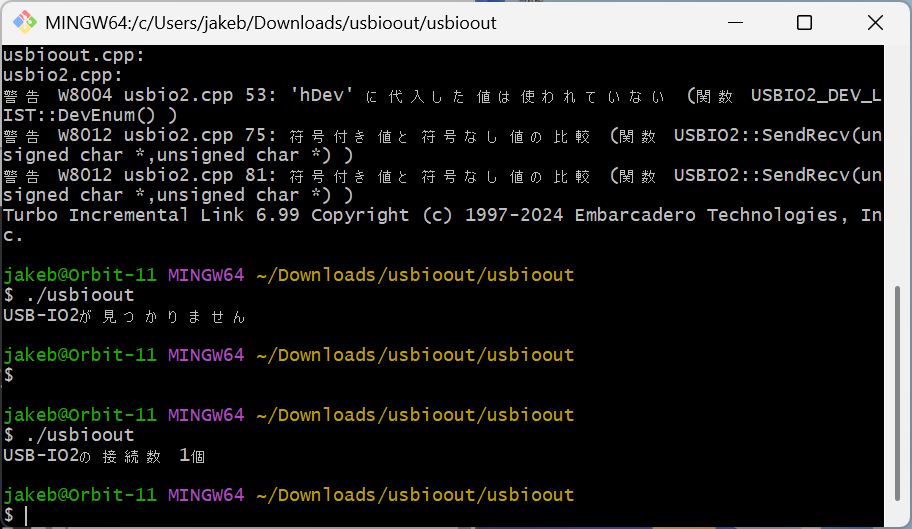
一度bcc32cでコンパイルしてみますか?

動いているようですね。
usbio2.cppとusbio2.hを使います。USB-IO2 AKIの端子は、
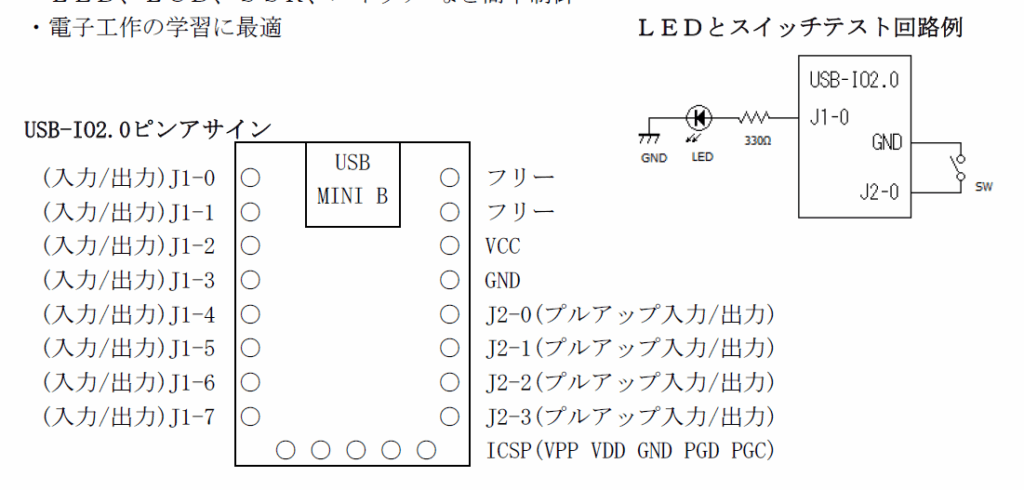
上図右と同様にJ1-0端子経由でドライブしますが、正論理ではなく負論理で引っ張ります。つまりJ1-0にLを出力した時にLEDが点灯するようにプログラミングしてみましょう。このチップはPICなので、吐き出し電流も吸い込み電流もどちらも差がないようですが、昔のロジックIC(TTLとかね)だとLに引っ張って、電流流すのが吉でした。
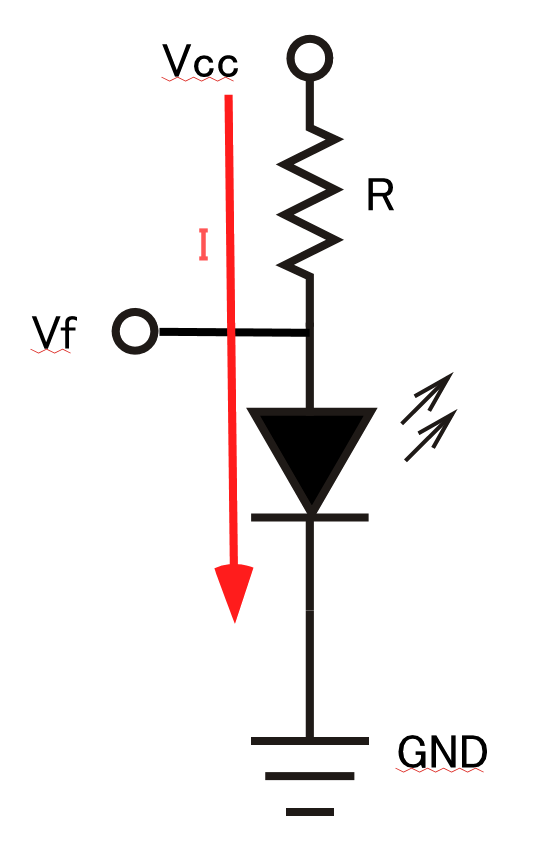
上図でVcc=5V、Vfは1.7V程度として、Iが10mAでまあまあな明るさでLEDが光りますので、Rは、Ωの法則により、Rの両端電圧 5-1.7 =3.3V、3.3Vかけて10mA流れている時のRはR=V/Iなので、330Ωということになります。今のデバイスならばどちらで使っても問題ないはずです。
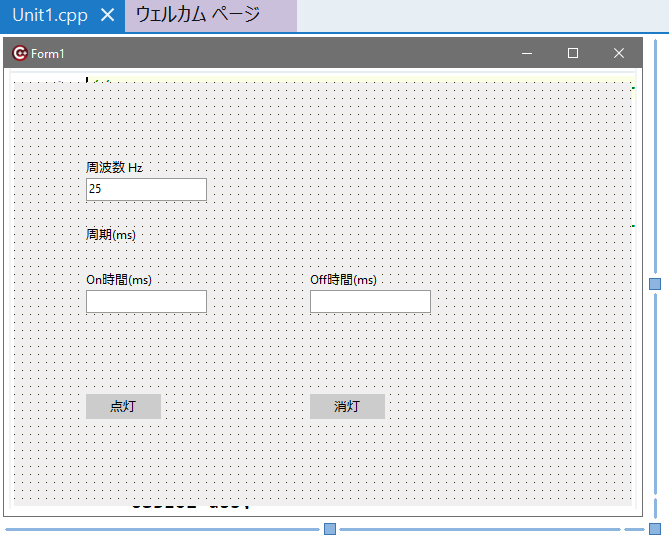
VCLの新規プログラムを立ち上げて、まずフォームは、
プロジェクトは、
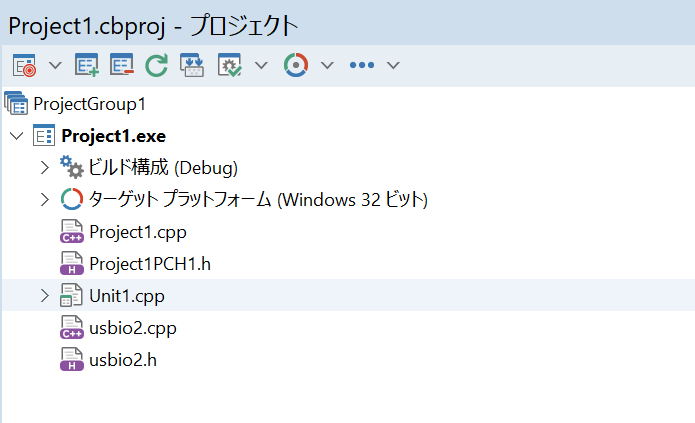
前に取り分けておいた山本さん作のusbio2.cppとusbio2.hを加えます。
Unit1.hは、(念のため)
#ifndef Unit1H
#define Unit1H
//---------------------------------------------------------------------------
#include <System.Classes.hpp>
#include <Vcl.Controls.hpp>
#include <Vcl.StdCtrls.hpp>
#include <Vcl.Forms.hpp>
#include <Vcl.ExtCtrls.hpp>
#include <Vcl.Mask.hpp>
//---------------------------------------------------------------------------
class TForm1 : public TForm
{
__published:	// IDE で管理されるコンポーネント
	TLabeledEdit *LabeledEdit1;
	TLabeledEdit *LabeledEdit2;
	TLabeledEdit *LabeledEdit3;
	TButton *Button1;
	TButton *Button2;
	TLabel *Label1;
	void __fastcall Button2Click(TObject *Sender);
	void __fastcall Button1Click(TObject *Sender);
	void __fastcall FormClose(TObject *Sender, TCloseAction &Action);
private:	// ユーザー宣言
public:		// ユーザー宣言
	__fastcall TForm1(TComponent* Owner);
};
//---------------------------------------------------------------------------
extern PACKAGE TForm1 *Form1;
//---------------------------------------------------------------------------
#endif
Unit1.cppは、
//---------------------------------------------------------------------------

#include <vcl.h>
#pragma hdrstop

#include "Unit1.h"
//---------------------------------------------------------------------------
#pragma package(smart_init)
#pragma resource "*.dfm"
TForm1 *Form1;
bool inloop = false;

#include "usbio2.h"

	unsigned out1 = 0xfe;
	unsigned out2 = 0xff;

	//unsigned j1,j2;//	for input
	USBIO2 usb;
		USBIO2_DEV_LIST list;
	USBIO2_DEV* p;


void putj1_0_h()
{
	out1 = 0xff;
	unsigned j1,j2;

	if( usb.InOut(out1,out2,&j1,&j2)== false ){
		printf("IO error \n");
		exit(1);
	}


}

void putj1_0_l()
{
	out1 = 0xfe;
	unsigned j1,j2;

	if( usb.InOut(out1,out2,&j1,&j2)== false ){
		printf("IO error \n");
		exit(1);
	}


}

//---------------------------------------------------------------------------
__fastcall TForm1::TForm1(TComponent* Owner)
	: TForm(Owner)
{
	int period;

	period  = 1000/StrToFloat(LabeledEdit1->Text);
	Label1->Caption += IntToStr(period);

	LabeledEdit2->Text = IntToStr(period/2);
	LabeledEdit3->Text = IntToStr(period/2);

		int	max = list.DevEnum();
	if( max == 0 ){
		//printf("USB-IO2 not found\n");
		exit(1);
	}

	//printf("numbers of found USB-IO2 is %d\n",max);

	p=list.FirstDev();

	if( usb.open(p->name) == 0 ){
		//printf("that name was not found\n");
		exit(1);
	}


}
//---------------------------------------------------------------------------
void __fastcall TForm1::Button2Click(TObject *Sender)
{
    inloop = false;
}
//---------------------------------------------------------------------------
void __fastcall TForm1::Button1Click(TObject *Sender)
{
	inloop = true;
	int ontime = StrToInt(LabeledEdit2->Text);
	int offtime = StrToInt(LabeledEdit3->Text);

	while( inloop ){
		putj1_0_l();
		Sleep(ontime);
		putj1_0_h();
		Sleep(offtime);
		Application->ProcessMessages();

	}
}
//---------------------------------------------------------------------------
void __fastcall TForm1::FormClose(TObject *Sender, TCloseAction &Action)
{
	usb.close();
}
//---------------------------------------------------------------------------
実行すると、
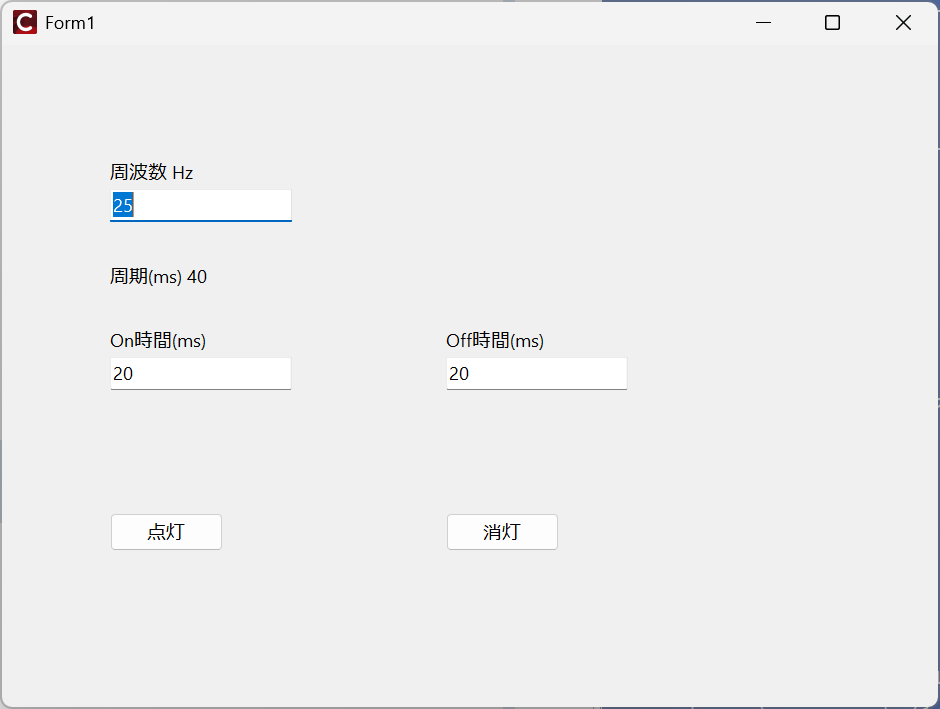
点灯をクリックすると、
ちらつきが多いので、少し点灯周期を調整します。On時間 100ms Off時間 100msで、5Hzにします。
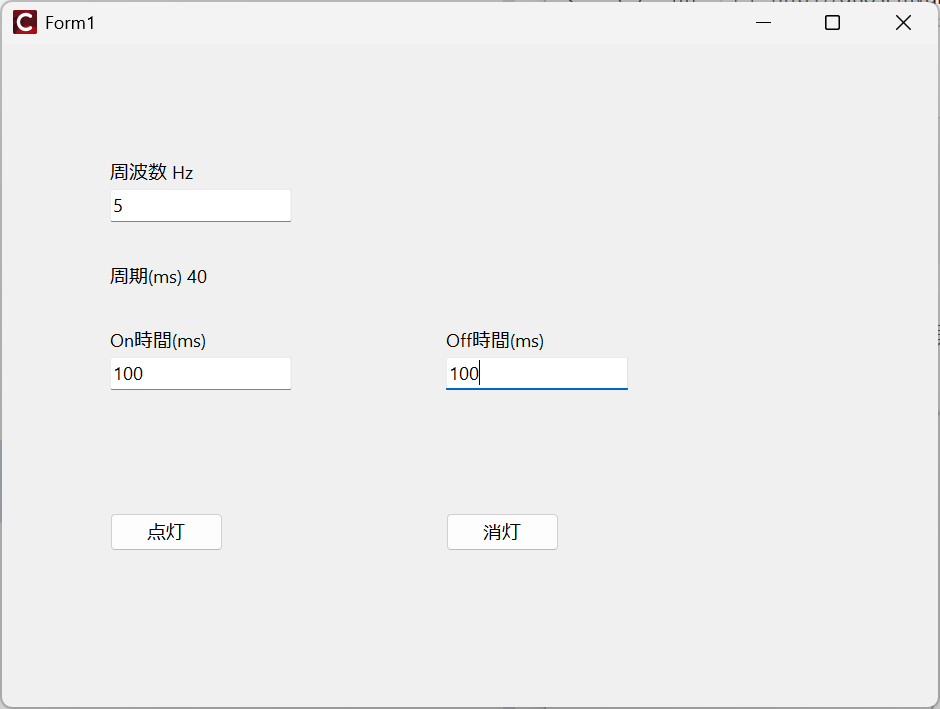
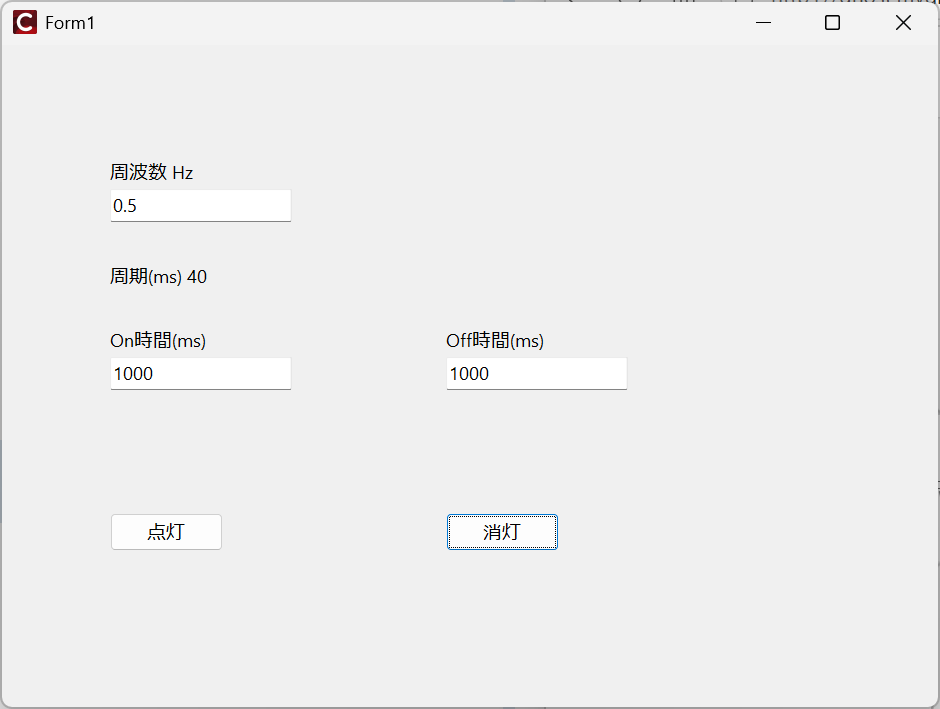
1秒に5回点滅しているはずです。さらに周期を長くして、
動画の撮影は、拙作のCRC64(Camera Remote Control 64)を使いました。レリーズなくてもシャッター手で押さないので、手ブレしません。

コメント