
iob.netの監視完結編
前記事https://ghost.mydns.jp/wordpress/c-builder-ce-code-fragment/の続編です。TNotificationCenterコンポーネントを使いますが、山本博さんのところに簡潔にまとまったコードがあるのでそれを参考にして作ります。
ここはよく参考にさせてもらっています。C++ Builderの記事も多いのですが、これはDelphiで書かれているので、逐次手動翻訳というか変換しました。もとのコードはコメントで織り込んでいますが、実際こうした作業では筆者はよくこうしてDelphiのコードを見ながら変換しています。さて、山本博(gesource)さんの元記事にあるようにフォームにまずTNotificationCenterコンポーネントを置きます。もちろん動的に割り当ててもいいのですが、元記事を尊重しました。で、まずheaderのUnit1.hは、
#ifndef Unit1H
#define Unit1H
//---------------------------------------------------------------------------
#include <System.Classes.hpp>
#include <Vcl.Controls.hpp>
#include <Vcl.StdCtrls.hpp>
#include <Vcl.Forms.hpp>
#include <System.Notification.hpp>
#include <IdBaseComponent.hpp>
#include <IdComponent.hpp>
#include <IdDNSResolver.hpp>
#include <IdTCPConnection.hpp>

//---------------------------------------------------------------------------
class TForm1 : public TForm
{
__published:	// IDE で管理されるコンポーネント
	TNotificationCenter *NotificationCenter1;

private:	// ユーザー宣言
public:		// ユーザー宣言
	__fastcall TForm1(TComponent* Owner);
};
//---------------------------------------------------------------------------
extern PACKAGE TForm1 *Form1;
//---------------------------------------------------------------------------
#endif
コード Unit1.cppは、
#include <vcl.h>
#pragma hdrstop

#include "Unit1.h"
//---------------------------------------------------------------------------
#pragma package(smart_init)
#pragma resource "*.dfm"
TForm1 *Form1;
String target = "wcam-xxxxyyyy.iobb.net";
String gaddress;

void NotifyClick()
{
/*
procedure TForm1.Button1Click(Sender: TObject);
var
  MyNotification: TNotification;
begin
  MyNotification := NotificationCenter1.CreateNotification;
  try
	//通知の一意の識別子
	MyNotification.Name := 'MyNotification';
	//通知のタイトル
	MyNotification.Title := '通知のタイトル';
	//通知メッセージのテキスト
	MyNotification.AlertBody := '通知メッセージのテキスト';
	//すぐに通知を表示
	NotificationCenter1.PresentNotification(MyNotification);
  finally
	MyNotification.Free;
  end;
end;

*/

	TNotification* MyNotification = Form1->NotificationCenter1->CreateNotification();

	try {
		MyNotification->Name = "MyNotification";
		MyNotification->Title = "DNS Results";
		MyNotification->AlertBody = gaddress;

		Form1->NotificationCenter1->PresentNotification(MyNotification);


	}

	__finally {
		delete MyNotification;

	}


}

//---------------------------------------------------------------------------
__fastcall TForm1::TForm1(TComponent* Owner)
	: TForm(Owner)
{
	try
	{

		TIdDNSResolver* resol = new TIdDNSResolver(this);

		resol->Host = "8.8.8.8"; // Google's public DNS server
		resol->QueryType = resol->QueryType << qtA;
		resol->Resolve(target);

		for (int i = 0; i < resol->QueryResult->Count; i++){
			TResultRecord* const Rec = dynamic_cast<TResultRecord*>(resol->QueryResult->Items[i]);
			if (Rec)
			{
			   if( Rec->RecType == qtA ) {
				gaddress =  ((TARecord*)(Rec))->IPAddress;
				//Label1->Caption = address;
			   }
			}
        }

	}
	catch (const Exception &E)
    {
		//ShowMessage("Error: " + E.Message);
		gaddress = "unknown ip address";
	}

	NotifyClick();
    Application->Terminate();
}
//---------------------------------------------------------------------------
String targetは本当のドメイン名を入れてください。
String target = "wcam-xxxxyyyy.iobb.net";これをBuild & Runすると、デスクトップの通知エリアに
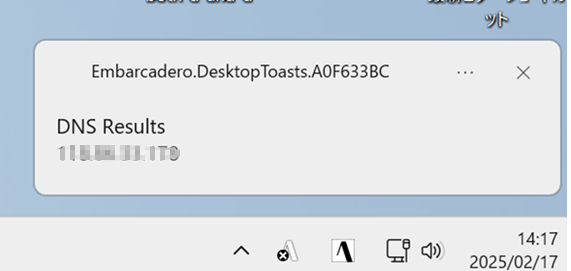
こんな感じで通知されます。あとはできたproject1.exeのショートカットをしかるべき場所におけばおけです。今回は、
にならって配置しました。
コメント