#1 DIO USB-IO2.0(AKI)でL.E.Dを駆動
手元にUSB-IO2.0(AKI)があったので、これでデジタル出力を簡易的に行って、LEDを駆動してみるよ。まずUSB-IO2.0(AKI)ですが、こいつの素性は、https://akizukidenshi.com/catalog/g/g105131/で、PCにUSBで接続するだけで、Digital In/Outができるものです。大学の研究室等でDIOをやる場合は、PCI-Eのスロットに拡張カード等を入れて、ドライバ入れて実験等に使いますが、こいつはドライバすら要りません。USBに指せば認識されます。ただしCやらC++から駆動するにはそれなりの準備が要ります。

秋月さんから基板の画像を借りましたが、USB端子の先には、ファームウエアを書き込んだPIC(18F14K50)があって、そのファームウエアに制御ソフトが書いてあります。で、色々な制御をするためには、適切にコマンド列をHID経由で送らねばなりません。そのコマンド体系は、
ここにhttps://km2net.com/usb-fsio/command.shtml記載されています。結構面倒です。そこで“Google先生”(別にBingでも良い)に“USB-IO2.0(AKI) C言語”とかとお伺いを立てると、ちゃんと結果が返ります。しかも一番上です。(注 本日時点)http://yamatyuu.net/computer/pic/usbio2/sample.html
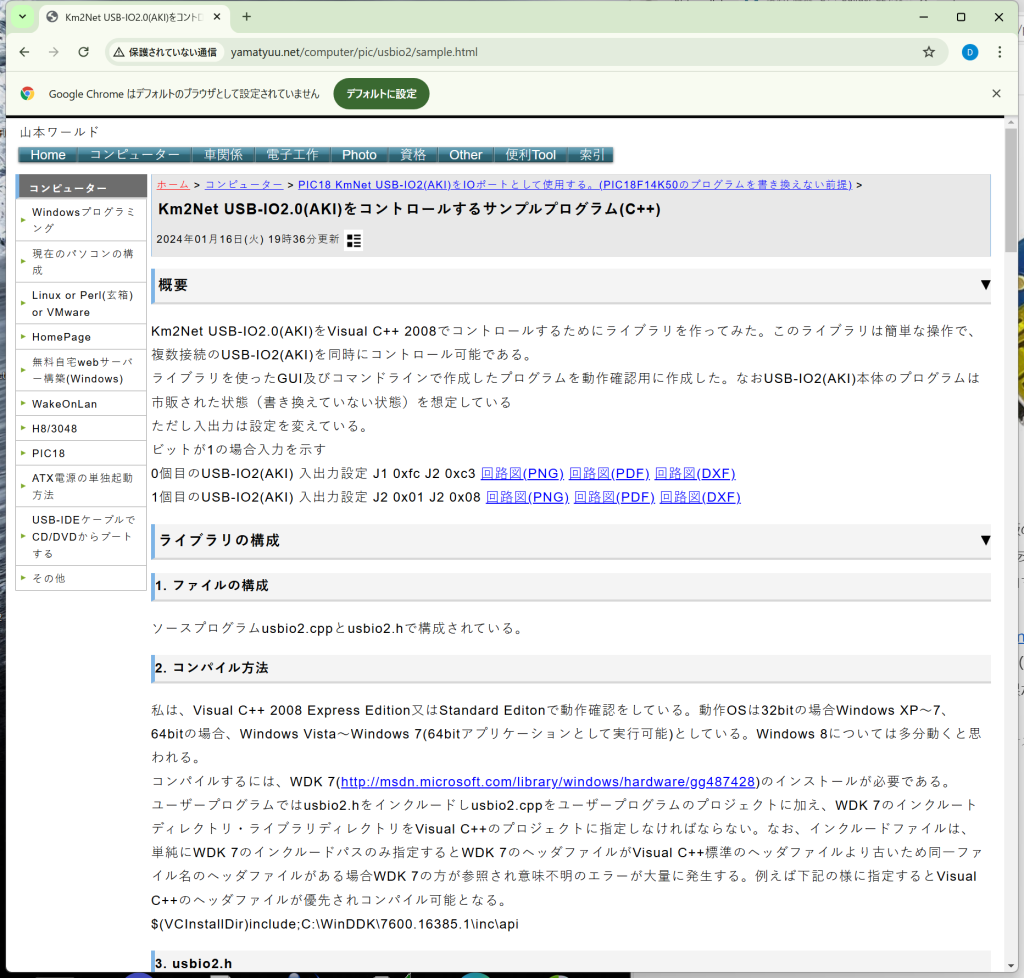
ここにライブラリとして記載されている“usbio2.h”と”usbio2.cpp”を使わせていただきます。山本ワールドさんありがとうございます。現状の基板の姿は、
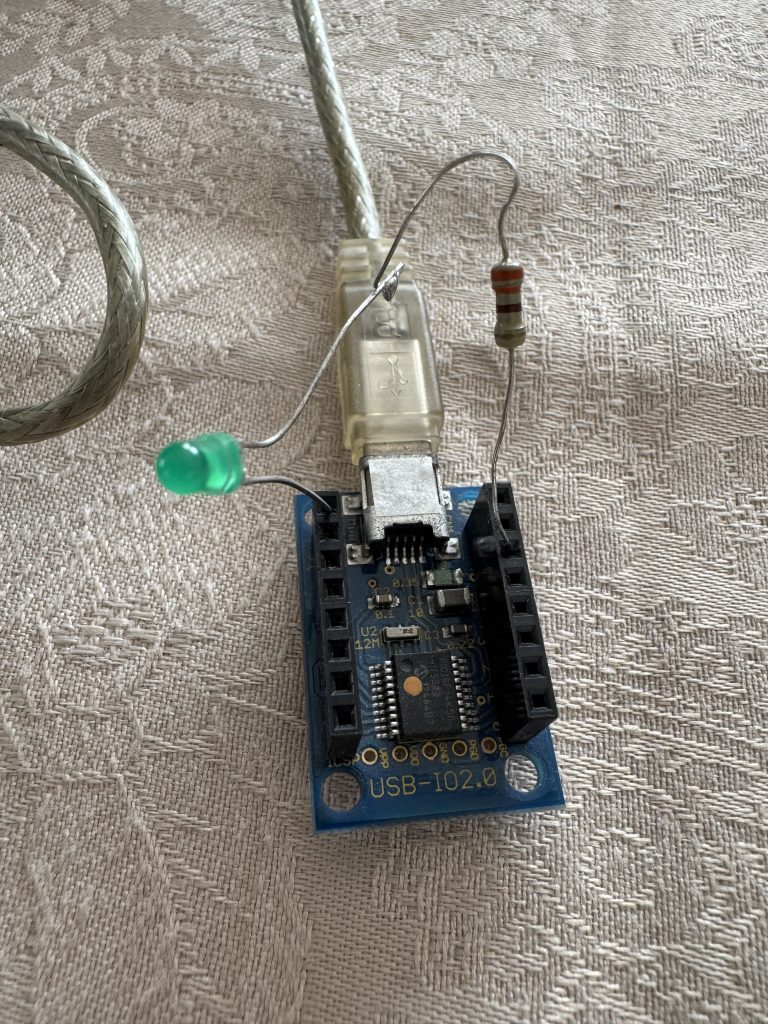
です、端子については、
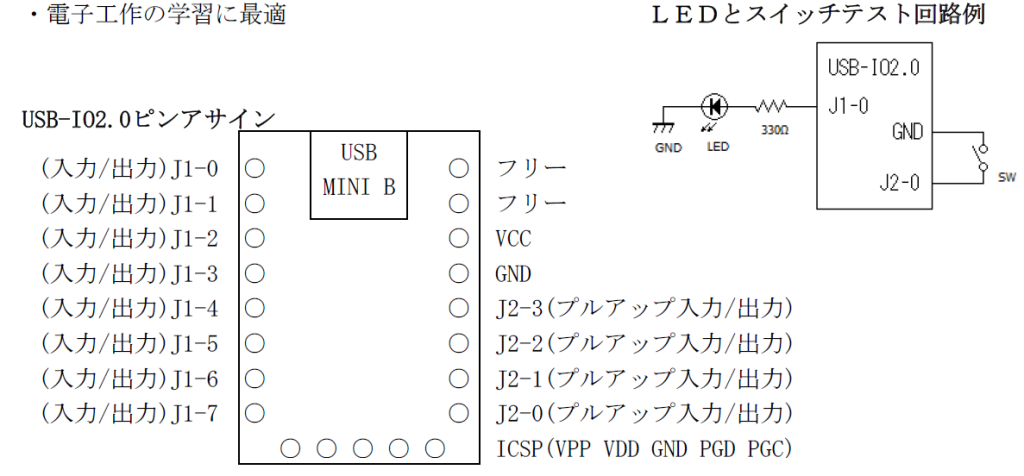
です。画像と対照させると、LEDとカーボン抵抗330Ωが直列につながれて、VCC->330Ω->LED->J1-0とつながっていますので、端子図右の回路例とはロジックが異なるので注意してください。筆者は太古よりロジックICは吸い込み能力の方が高いという”思い込み”があり、大抵こういう負論理(つまりアクティブロー)の回路を組みます。PIC 18F14K50はそれほどドライブ電流に差はないようですね。ま、別記事のLEDの駆動回路の設定例のように10mA程度駆動できればNP(No Problemつまりおけ)です。
さて、”山本ワールドさんのサイト”から取ってきた二つのファイルに下記の”main.cpp”を加えて、
#include <stdio.h>
#include "usbio2.h"

	unsigned out1 = 0xfe;
	unsigned out2 = 0xff;

	unsigned j1,j2;//	for input
	USBIO2 usb;


void putj1_0_h()
{
	out1 = 0xff;
	if( usb.InOut(out1,out2,&j1,&j2)== false ){
		printf("IO error \n");
		exit(1);
	}


}

void putj1_0_l()
{
	out1 = 0xfe;
	if( usb.InOut(out1,out2,&j1,&j2)== false ){
		printf("IO error \n");
		exit(1);
	}


}


int main(int argc, char** argv)
{

	USBIO2_DEV_LIST list;
	USBIO2_DEV* p;


	int	max = list.DevEnum();
	if( max == 0 ){
		printf("USB-IO2 not found\n");
		exit(1);
	}

	printf("numbers of found USB-IO2 is %d\n",max);

	p=list.FirstDev();

	if( usb.open(p->name) == 0 ){
		printf("that name was not found\n");
		exit(1);
	}

	for(int count = 0 ; count < 100 ; count++ ){
		putj1_0_l();
		Sleep(200);
		putj1_0_h();
        Sleep(200);
	}
	usb.close();

	printf("input values j1[%x] j2[%x]\n",j1,j2);

}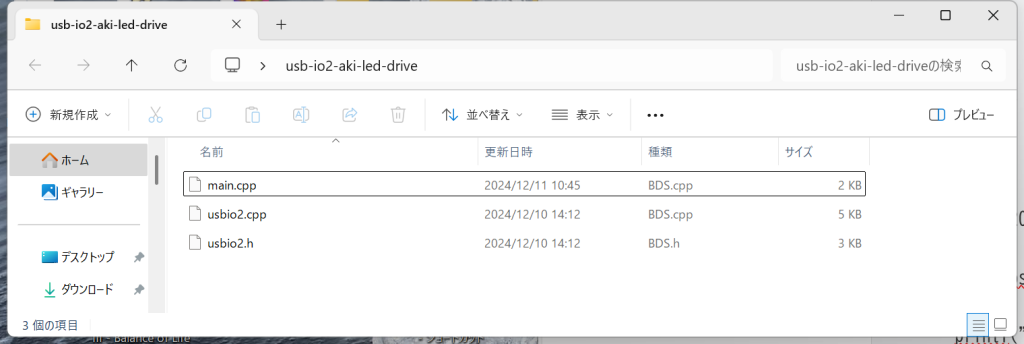
こうなっているところで、何もないところで右クリックして、
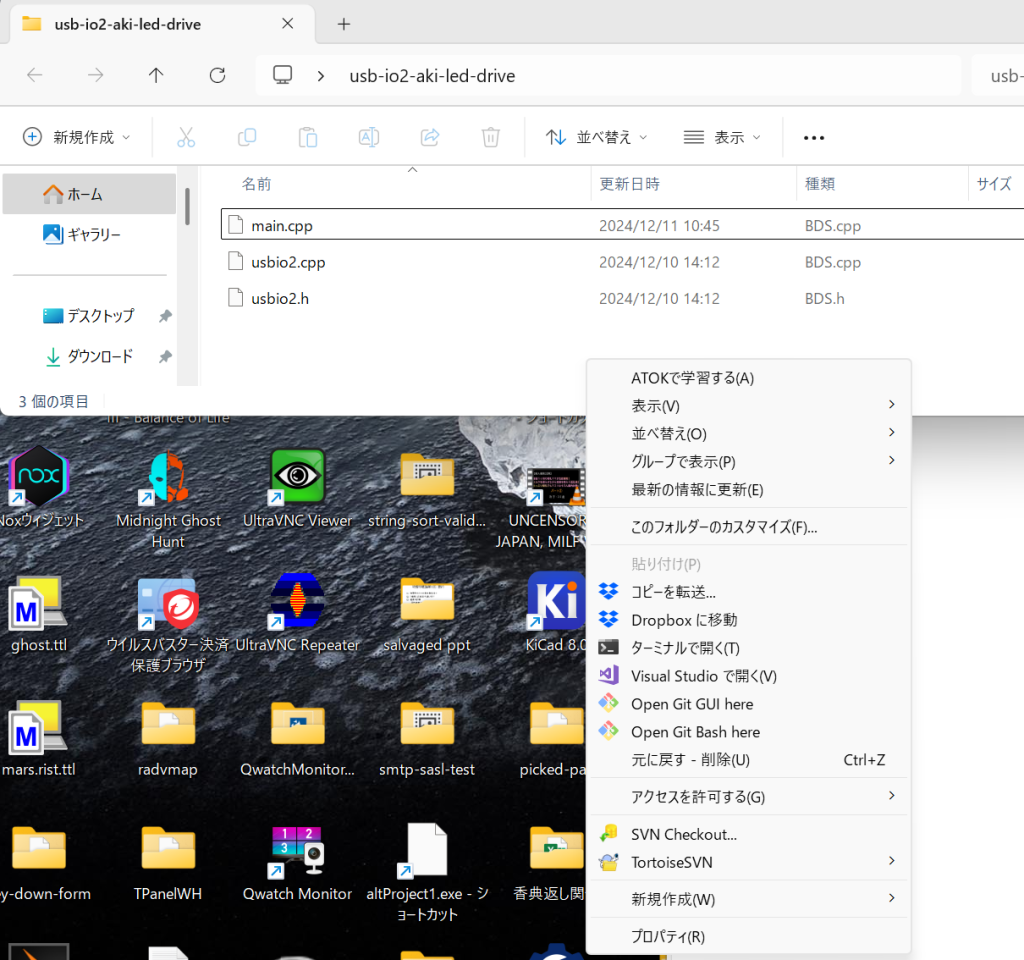
ここで”Open Git Bash here”を選択。別記事で触れましたね。今はGitは使いません。bcc32つまりBorland C Compiler 32bitを使います。
jakeb@Orbit-11 MINGW64 ~/OneDrive/Desktop/usb-io2-aki-led-drive
$ bcc32 main.cpp usbio2.cpp
Embarcadero C++ 7.70 for Win32 Copyright (c) 1993-2017 Embarcadero Technologies, Inc.
main.cpp:
警告 W8057 main.cpp 72: パラメータ 'argc' は一度も使用されない (関数 main(int,char * *) )
警告 W8057 main.cpp 72: パラメータ 'argv' は一度も使用されない (関数 main(int,char * *) )
usbio2.cpp:
警告 W8004 usbio2.cpp 53: 'hDev' に代入した値は使われていない (関数 USBIO2_DEV_LIST::DevEnum() )
警告 W8012 usbio2.cpp 75: 符号付き値と符号なし値の比較 (関数 USBIO2::SendRecv(unsigned char *,unsigned char *) )
警告 W8012 usbio2.cpp 81: 符号付き値と符号なし値の比較 (関数 USBIO2::SendRecv(unsigned char *,unsigned char *) )
Turbo Incremental Link 6.99 Copyright (c) 1997-2024 Embarcadero Technologies, Inc.
警告は多々でていますが、ちゃんと“main.exe”が出来ています。実行してみましょうかね?
jakeb@Orbit-11 MINGW64 ~/OneDrive/Desktop/usb-io2-aki-led-drive
$ ls -alt
total 476
drwxr-xr-x 1 jakeb 197609      0 12月 11 14:28 ./
-rw-r--r-- 1 jakeb 197609 196608 12月 11 14:28 main.tds
-rwxr-xr-x 1 jakeb 197609 162304 12月 11 14:28 main.exe*
-rw-r--r-- 1 jakeb 197609  17198 12月 11 14:28 usbio2.obj
-rw-r--r-- 1 jakeb 197609  17124 12月 11 14:28 main.obj
drwxr-xr-x 1 jakeb 197609      0 12月 11 13:41 ../
-rw-r--r-- 1 jakeb 197609   1043 12月 11 10:45 main.cpp
-rw-r--r-- 1 jakeb 197609   2398 12月 10 14:12 usbio2.h
-rw-r--r-- 1 jakeb 197609   4507 12月 10 14:12 usbio2.cpp

jakeb@Orbit-11 MINGW64 ~/OneDrive/Desktop/usb-io2-aki-led-drive
$ ./main
numbers of found USB-IO2 is 1
動いている時の動画は、
です。めでたしめでたしではありません。これではC++ Builder CEじゃないじゃない。(笑)
VCLプログラムを新規に作成し、フォームを

こんな感じに作ります。Editボックスが3個ありますが、全部TLabeledEditです。Editにラベルが付いたもので、便利です。LED点滅の周波数をHzで入れて、そこでの点灯時間と消灯時間を設定できるというようにしたいという目論みです。ここくらいまでできたら、一旦セーブして、そのディレクトリに先の“usbio2.h”,“usbio2.cpp”,“main.cpp”をコピーしておきます。“main.cpp”だけは観るだけで、プロジェクトには入れません。再度IDEを起動して、project1.exeを右クリックして出てくる。下記メニューで、
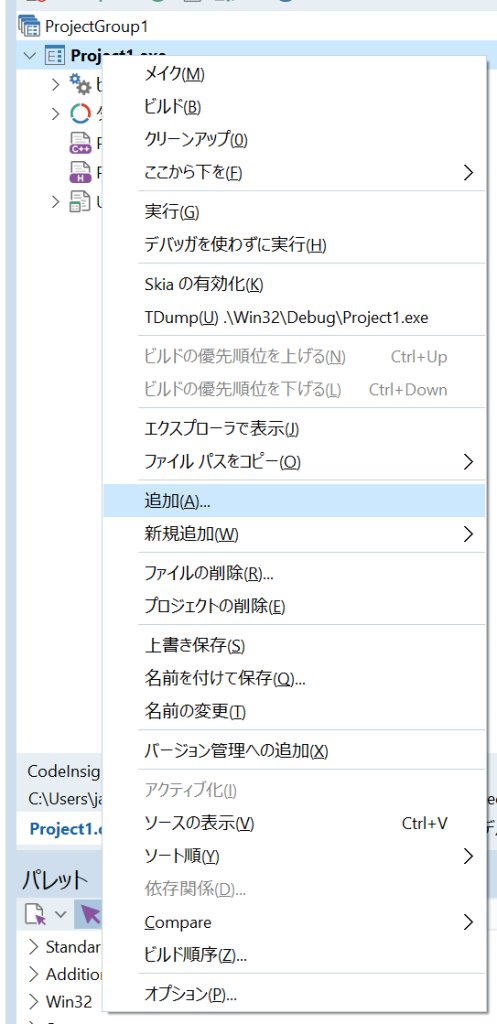
上記のように追加を選んで、コピーしてきた“usbio2.cpp”と”usbio2.h”を加えます。。

main.cppを開いて、
#include "usbio2.h"

	unsigned out1 = 0xfe;
	unsigned out2 = 0xff;

	unsigned j1,j2;//	for input
	USBIO2 usb;


void putj1_0_h()
{
	out1 = 0xff;
	if( usb.InOut(out1,out2,&j1,&j2)== false ){
		printf("IO error \n");
		exit(1);
	}


}

void putj1_0_l()
{
	out1 = 0xfe;
	if( usb.InOut(out1,out2,&j1,&j2)== false ){
		printf("IO error \n");
		exit(1);
	}


}
この部分をフォームのコンストラクタの上くらいに突っ込みます。
全体のコードを示すと、
//---------------------------------------------------------------------------

#include <vcl.h>
#pragma hdrstop

#include "Unit1.h"
//---------------------------------------------------------------------------
#pragma package(smart_init)
#pragma resource "*.dfm"
TForm1 *Form1;
bool inloop = false;

#include "usbio2.h"

	unsigned out1 = 0xfe;
	unsigned out2 = 0xff;

	//unsigned j1,j2;//	for input
	USBIO2 usb;
		USBIO2_DEV_LIST list;
	USBIO2_DEV* p;


void putj1_0_h()
{
	out1 = 0xff;
	unsigned j1,j2;

	if( usb.InOut(out1,out2,&j1,&j2)== false ){
		printf("IO error \n");
		exit(1);
	}


}

void putj1_0_l()
{
	out1 = 0xfe;
	unsigned j1,j2;

	if( usb.InOut(out1,out2,&j1,&j2)== false ){
		printf("IO error \n");
		exit(1);
	}


}

//---------------------------------------------------------------------------
__fastcall TForm1::TForm1(TComponent* Owner)
	: TForm(Owner)
{
	int period;

	period  = 1000/StrToInt(LabeledEdit1->Text);
	Label1->Caption += IntToStr(period);

	LabeledEdit2->Text = IntToStr(period/2);
	LabeledEdit3->Text = IntToStr(period/2);

		int	max = list.DevEnum();
	if( max == 0 ){
		//printf("USB-IO2 not found\n");
		exit(1);
	}

	//printf("numbers of found USB-IO2 is %d\n",max);

	p=list.FirstDev();

	if( usb.open(p->name) == 0 ){
		//printf("that name was not found\n");
		exit(1);
	}


}
//---------------------------------------------------------------------------
void __fastcall TForm1::Button2Click(TObject *Sender)
{
    inloop = false;
}
//---------------------------------------------------------------------------
void __fastcall TForm1::Button1Click(TObject *Sender)
{
	inloop = true;
	int ontime = StrToInt(LabeledEdit2->Text);
	int offtime = StrToInt(LabeledEdit3->Text);

	while( inloop ){
		putj1_0_l();
		Sleep(ontime);
		putj1_0_h();
		Sleep(offtime);
		Application->ProcessMessages();

	}
}
//---------------------------------------------------------------------------
void __fastcall TForm1::FormClose(TObject *Sender, TCloseAction &Action)
{
	usb.close();
}
//---------------------------------------------------------------------------
上記コードで一応動いています。ちなみにButton1Click内の無限ループでは最後にApplication->ProcessMessages()を呼び出して、イベントを監視しています。そうしないとButton2のクリックを検出しない可能性が大だからです。タイマーを使った方が良かったかもしれません。次は、usb->rs232c->LED(WS2812b)の予定です。いつになるかは不明ですが…..。


コメント
[…] 前記事C++ Builder CE 周辺拡張の続編です。今回は、USBにつないだRS232CへのI/F経由でWS2812Bの8素子LEDを駆動してみます。使用するI/FはFT234X 超小型USBシリアル変換モジュールです。秋月電子で購入しました。 […]